The two most crucial days of the Battle of Chancellorsville took place on May 2 and 3, 1863, so this weekend marked an excellent opportunity to recreate it. This battle’s long fascinated me, especially with the divide-and-conquer flanking march through The Wilderness Jackson pulled off on May 2. And given that I don’t have a battle-specific game for this one at the moment, the Chancellorsville scenario in Battle Cry(the 1999 Richard Borg design that kicked off the Commands and Colors system, since seen in the likes of Memoir ’44, Commands and Colors: Ancients, Battlelore and more) seemed like a good way to recreate it. Here’s a look at how the battle played out this time, with me playing both sides. For background info on Chancellorsville, the American Battlefields Trust page and the Wikipedia page are quite good; there was also a very funny thread from Matt Palmquist (@CivilWarHumor) this weekend, starting with a good map overview.
#OTD in 1863, Joe Hooker was cheered as he inspected his lines at the Chancellorsville crossroads. The day before, he said, “I’ve got Lee just where I want him.” But like the Phil Collins song, there was something “in the air tonight” — namely, the right flank of the 11th Corps. pic.twitter.com/GI7MuI3BW6
And for those unfamiliar with Battle Cry, it’s a low-complexity wargame where each side takes a turn playing one command card. Those cards usually activate one or more units in one of the three regions of the map. All moves are done before battles, and battles can be resolved in any order the activating player chooses. Infantry and cavalry can move and battle, artillery can move or battle, and generals can only move (but they can attach to other formations to give them an extra die). Battle involves just the attacking player rolling a number of dice; that number starts at five for artillery attacking an adjacent hex, four for infantry attacking an adjacent hex, and drops by one for each further hex away. Some terrain also reduces the number of dice the attacker gets; notably for this map, forests and hills drop the attacker’s dice by one, fieldworks drop it by two. All units always attack at their full strength even if they’ve suffered losses.
The six-sided dice have two infantry results, with the other sides being cavalry, artillery, sword and flag results. To record a hit, you need to roll the type of unit you’re attacking. Swords are wild (hits on anything), and flags force retreats. A hit removes one figure; infantry have three basic figures and a flagbearer, cavalry have two and one, artillery have one and one, and generals only have a flagbearer (but can only be killed if they’re attacked when they’re not attached to a unit and if a swords result is rolled). The goal is to eliminate six enemy units’ flags, and the flagbearer is always removed last.
And now, on to the game report in photos (a technique I particularly like thanks to Hiew’s excellent blog).
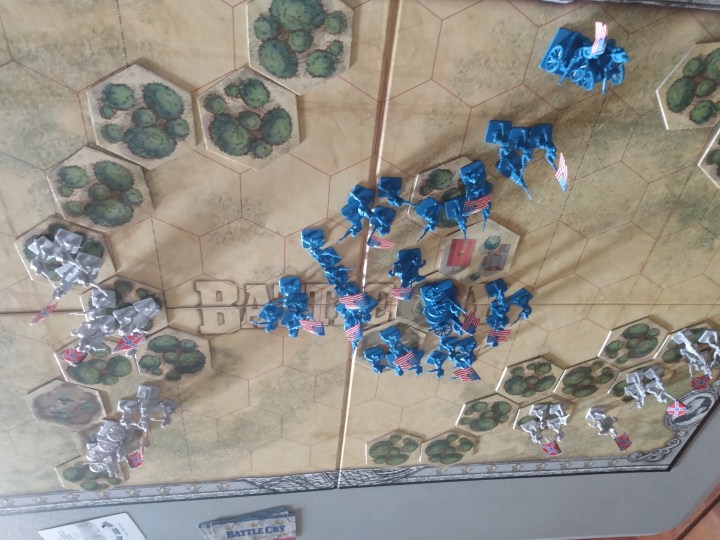
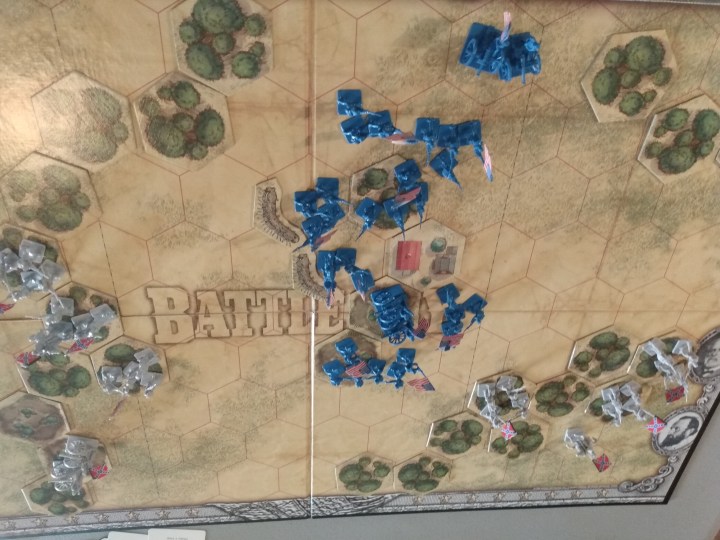
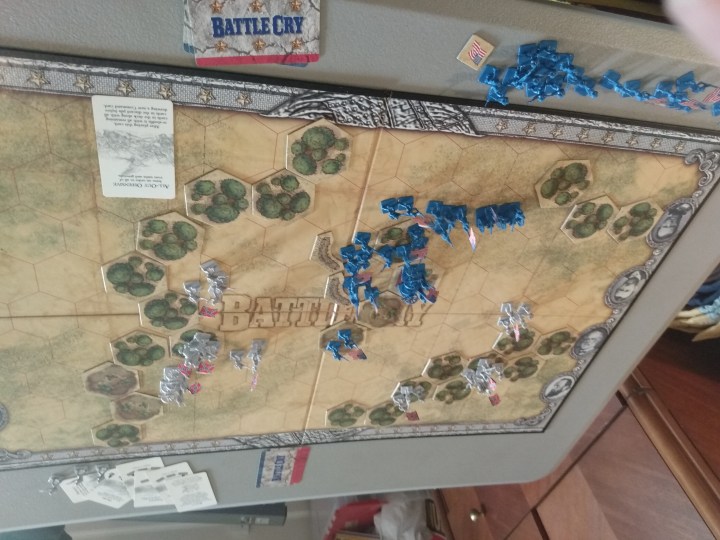
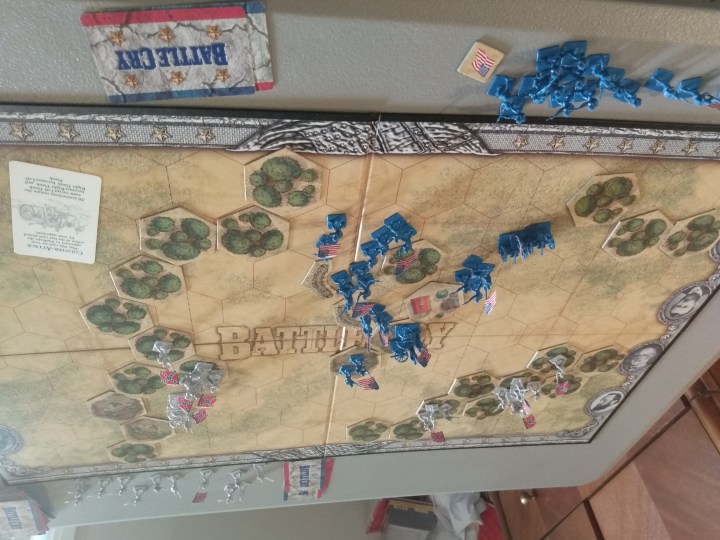
The Chancellorsville scenario setup. Jackson’s forces are to the left (west), Lee’s to the right (east). Hooker’s troops are in the middle around the town.The Confederates go first here, as you’d expect. The hand I randomly drew for their side started with an assault (activate all troops) card for Jackson’s wing, which was a nice note to history. The first assault wiped out the infantry closest to Jackson’s lines (probably part of Howard’s corps) and pushed the other forces near the south of the map back towards town.The Union was unable to do much with their first couple of turns (seems historically accurate!), with one turn even being a discard and draw thanks to only holding cards that couldn’t activate anything. Some further Confederate assaults led to this situation. The CSA has already knocked out two Union flags and weakened some other units without losing much themselves.The Union army has had some rough card draws so far (and they’re hurt by only having three cards to the CSA’s five in this scenario), so they haven’t been able to do much attacking. But they did draw a fieldworks card, allowing the construction of two fieldworks around Chancellorsville. That gives those two units more defense (reducing the dice rolled against them by two). Unlike Hooker’s historical order for Sickles to abandon the earthworks in Hazel Grove, these units won’t be leaving these fieldworks any time soon.The All-Out Offensive card is the most powerful in the game, letting you activate all your units. The CSA drew it and used it to solid advantage, attacking with both Lee and Jackson’s forces in a move that feels like what historically happened in the morning of May 3. (Granted, at that point, Stuart was in command of Jackson’s troops after Jackson was hit by friendly fire the previous night.) You can see the mounting Union casualties at the top of the image, including four of the six flags necessary for victory; meanwhile, the CSA has only lost three figures and no flags. But this offensive did leave their troops more exposed outside of the woods.Finally, some luck for the Union. They drew a Counterattack card, which copies the opponent’s last order. And All-Out Offensive is the best possible thing to copy, especially with several CSA troops now out of the woods and into the open. This turn sees the Union eliminate seven CSA figures, including one flag.A couple of turns later, the Confederates have kept up their attacks, and they’re now one flag away from victory. They’ve also pushed the Union off both of the key hills in the middle, and forced the artillery to retreat to the buildings in Chancellorsville (and you can’t fire from a building, so that’s a useful result; it actually happened twice during this battle, with the artillery being pushed back there, moving back to the hill, and then being pushed back again). But the CSA has taken some heavy losses along the way, and the Union has done well to bring its northernmost artillery and infantry (likely Reynolds’ troops) into the fight. The flag score is now CSA 5, Union 3.The Union has run out of useful attack cards, so they try to recreate the historical result of picking off Jackson (although that was by friendly fire rather than sharpshooters and happened earlier in the battle). But they fail their die roll, and he survives.The Confederates press for the victory with some much-reduced troops from Jackson’s command, and they get it, recording their sixth flag. But they did take heavy losses. Final score, CSA 6, Union 3.
Overall, Battle Cry is far from the most comprehensive simulation, especially when it comes to what units you can activate being limited by your cards and to wounded units still attacking at full strength. And as an overall war title rather than one specifically focused on this battle, it obviously doesn’t have as much particular chrome or orders of battle as you might find in a more narrowly-focused title. But I love this game for what it’s able to do with a rules-light, easy-to-teach-and-play approach, and the scenarios are very well-designed, making strong use of terrain and of differing hand sizes to give you some similarities to what actually happened in a wide variety of different battles. Playing out the Chancellorsville scenario this way was a lot of fun, and a great way to re-explore that part of history.


One thought on “Exploring Chancellorsville through Battle Cry”